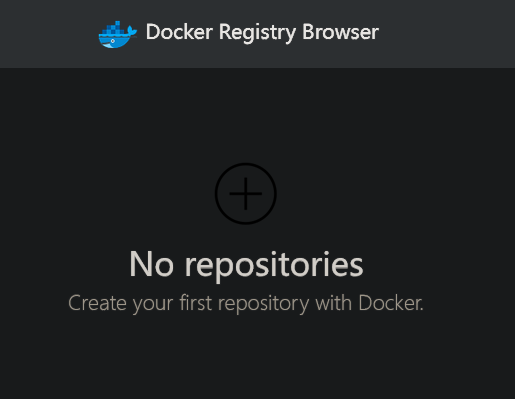
当Registry有了UI之后操作特方便了,非常爽~
镜像地址
- Registry: https://hub.docker.com/_/registry
- Registry UI: https://hub.docker.com/r/dqzboy/docker-registry-ui
运行配置
具体使用k3s部署的,运行配置只列举重要的,毕竟yaml文件太长了…
特别重要的参数也会单独描述,不能直接复制yaml来用,得根据需求修改,毕竟资源体是不同的
- Registry
- 更多配置
---
apiVersion: apps/v1
kind: Deployment
metadata:
 ...
spec:
  ...
  template:
    metadata:
      ...
    spec:
      containers:
        - env:
            # 授权方式
            - name: REGISTRY_AUTH
              value: htpasswd
            # 授权文件
            - name: REGISTRY_AUTH_HTPASSWD_PATH
              value: /auth/htpasswd
            # 身份验证机制
            - name: REGISTRY_AUTH_HTPASSWD_REALM
              value: Registry Realm
           # 调试模式
            - name: DOCKER_DEBUG
              value: '1'
           # 禁用数据追踪
            - name: OTEL_TRACES_EXPORTER
              value: none
          # 镜像地址
          image: 'registry:latest'
          imagePullPolicy: Always
          # 活性探针
          livenessProbe:
            failureThreshold: 3
            initialDelaySeconds: 10
            periodSeconds: 10
            successThreshold: 1
            tcpSocket:
              port: 5000
            timeoutSeconds: 1
          name: registry
          # 端口配置
          ports:
            - containerPort: 5000
              name: registry
              protocol: TCP
          # 就绪探针
          readinessProbe:
            failureThreshold: 3
            initialDelaySeconds: 10
            periodSeconds: 10
            successThreshold: 1
            tcpSocket:
              port: 5000
            timeoutSeconds: 1
          # 资源控制
          resources:
            limits:
              cpu: '1'
              memory: 1Gi
            requests:
              cpu: 200m
              memory: 200Mi
          # 启动探针
          startupProbe:
            failureThreshold: 3
            initialDelaySeconds: 10
            periodSeconds: 10
            successThreshold: 1
            tcpSocket:
              port: 5000
            timeoutSeconds: 1
          # 挂载配置
          volumeMounts:
            # 授权配置目录
            - mountPath: /auth
              name: volume-r2
              subPath: auth
           # 镜像存储目录
            - mountPath: /var/lib/registry
              name: volume-r2
              subPath: data
      # dns配置
      dnsConfig:
        nameservers:
          - 114.114.114.114
      dnsPolicy: ClusterFirst
      ...
- Registry UI
- 更多配置
apiVersion: apps/v1
kind: Deployment
metadata:
    ...
    spec:
      containers:
        - env:
            # 仓库地址(同命名空间可以直接用name+port)
            - name: DOCKER_REGISTRY_URL
              value: 'http://registry:5000'
            # 秘钥
            - name: SECRET_KEY_BASE
              value: eZBT6nL9bo16s24Xwifs9r
            # 启用图像删除
            - name: ENABLE_DELETE_IMAGES
              value: 'true'
           # 禁用SSL验证
            - name: NO_SSL_VERIFICATION
              value: 'true'
          # 镜像地址
          image: 'dqzboy/docker-registry-ui:latest'
          imagePullPolicy: Always
          # 活性探针
          livenessProbe:
            failureThreshold: 3
            initialDelaySeconds: 10
            periodSeconds: 10
            successThreshold: 1
            tcpSocket:
              port: 8080
            timeoutSeconds: 1
          name: registry-ui
          # 端口配置
          ports:
            - containerPort: 8080
              name: registry-ui
              protocol: TCP
          # 就绪探针
          readinessProbe:
            failureThreshold: 3
            initialDelaySeconds: 10
            periodSeconds: 10
            successThreshold: 1
            tcpSocket:
              port: 8080
            timeoutSeconds: 1
          # 资源配置
          resources:
            limits:
              cpu: '1'
              memory: 1Gi
            requests:
              cpu: 200m
              memory: 200Mi
          # 启动探针
          startupProbe:
            failureThreshold: 3
            initialDelaySeconds: 10
            periodSeconds: 10
            successThreshold: 1
            tcpSocket:
              port: 8080
            timeoutSeconds: 1
      # dns配置
      dnsConfig:
        nameservers:
          - 114.114.114.114
      dnsPolicy: ClusterFirst
      ...
Registry仓库密码生成
- 主要是利用
httpd作为授权生成工具,将授权写到htpasswd中,Registry会自动读取 - 脚本目前是使用
podman,使用docker需要修改下
#!/bin/bash

# 检查是否提供了用户名和密码
if [ "$#" -ne 2 ]; then
    echo "Usage: $0 <username> <password>"
    exit 1
fi
# 读取用户名和密码
USERNAME=$1
PASSWORD=$2
# 清空配置
> htpasswd
# 生成 .htpasswd 文件
podman run --rm --entrypoint htpasswd httpd -Bbn "$USERNAME" "$PASSWORD" > htpasswd
# 检查 .htpasswd 文件是否成功生成
if [ $? -eq 0 ]; then
    echo "htpasswd file has been created successfully."
else
    echo "Failed to create htpasswd file."
    exit 2
fi