【携手共建 智慧共享】 本帖支持编辑,欢迎参与创作 【你我同行 勠力同心】
什么是Oauth
OAuth(Open Authorization),目前最新版本是OAuth 2.0,是一个开放网络标准,旨在实现授权。日常使用的第三方登录方式,如Google账号登录,就采用了该标准。OAuth允许用户授权第三方应用访问存储在其他服务提供商(如Google)上的信息,而无需在不同平台上重复填写注册表单。用户授权后,平台可以直接访问用户的Google账户信息进行身份验证,而用户无需向第三方应用提供密码。
OAuth涉及的六方
- 资源所有者(Resource Owner / User):用户本人,即资源的所有者,比如用户的昵称、头像等信息。
- 用户代理(User Agent):比如用户的浏览器。
- 第三方应用(Third-Party Application / Client):需要访问资源的应用程序,比如各种网站或应用。
- HTTP服务(HTTP Service):提供服务的平台,比如某个论坛或网站。
- 授权服务器(Authorization Server):处理认证和授权请求的服务器。
- 资源服务器(Resource Server):存储用户资源的服务器。
OAuth提供的四种授权模式
OAuth提供了四种不同的授权模式:授权码模式、简化模式、密码模式和客户端模式。以下是各个模式的运行原理和步骤:
授权码模式(Authorization Code)
第一步:获取授权码
授权码请求链接格式:
http://localhost:8080/oauth/authorize?client_id=123456&response_type=code&scope=all&redirect_url=http://localhost:8080/oauth/token
返回的JSON格式:
{
  "code": "123456",
  "state": "123456"
}
第二步:申请令牌
令牌请求链接格式:
http://localhost:8080/oauth/token?client_id=123456&client_secret=123456&grant_type=authorization_code&code=123456&redirect_url=http://localhost:8080/oauth/callback
返回的JSON格式:
{
  "access_token": "123456",
  "token_type": "bearer",
  "scope": "read",
  "refresh_token": "123456"
}
资源请求链接格式:
http://localhost:8080/oauth/resource?access_token=123456
返回的JSON格式:
{
  "resource": "123456"
}
简化模式(Implicit)
简化模式跳过授权码,直接获取访问令牌,适用于没有后台服务程序的单页面应用。
令牌请求链接格式:
http://localhost:8080/oauth/token?client_id=123456&client_secret=123456&response_type=token&scope=all&redirect_url=http://localhost:8080/oauth/callback
返回的JSON格式:
{
  "access_token": "123456",
  "token_type": "bearer",
  "scope": "read",
  "refresh_token": "123456"
}
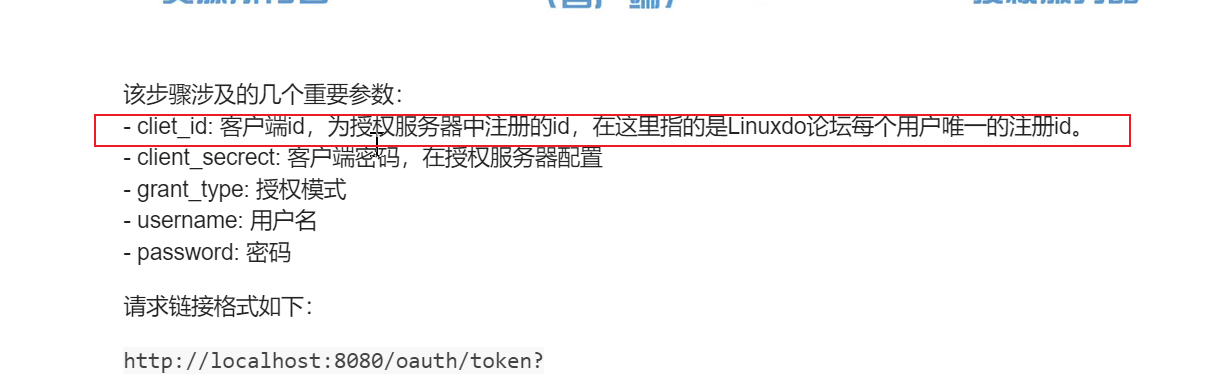
密码模式(Password)
用户通过客户端使用用户名和密码向授权服务器请求授权,授权服务器向客户端发送访问令牌和更新令牌。
请求链接格式:
http://localhost:8080/oauth/token?client_id=123456&client_secret=123456&grant_type=password&username=admin&password=admin
返回的JSON格式:
{
  "access_token": "123456",
  "token_type": "bearer",
  "scope": "read",
  "refresh_token": "123456"
}
客户端模式(Client Credentials)
客户端以自己的名义使用客户端ID和密钥向授权服务器请求授权,最简单的授权模式。
请求链接格式:
http://localhost:8080/oauth/token?client_id=123456&client_secret=123456&grant_type=client_credentials
返回的JSON格式:
{
  "access_token": "123456",
  "token_type": "bearer",
  "scope": "read",
  "refresh_token": "123456"
}
Linux do 实战
下面,我将以始皇提供的测试接口为例进行解析,注意:本站使用的是授权码模式。
第一步,获取授权码
authorize endpoint: https://connect.linux.do/oauth2/authorize
在浏览器中访问以下URL以获取授权码:
返回如下,提取返回链接中的code值进入下一步
http://localhost:8181/oauth2/callback?code=HgnkwFsCpXYKUDvTfvjJV9ow8iEx3KaQ&state=ttt1
第二步,获取令牌
token endpoint: https://connect.linux.do/oauth2/token
将 client_id 和 client_secret 用冒号后进行Base64编码作为请求头:
echo -n "hi3geJYfTotoiR5S62u3rh4W5tSeC5UG:VMPBVoAfOB5ojkGXRDEtzvDhRLENHpaN" | base64
所给的示例输出:
aGkzZ2VKWWZUb3RvaVI1UzYydTNyaDRXNXRTZUM1VUc6Vk1QQlZvQWZPQjVvamtHWFJERXR6dkRoUkxFTkhwYU4=
请求示例:
curl -X POST \
  https://connect.linux.do/oauth2/token \
  -H "Authorization: Basic aGkzZ2VKWWZUb3RvaVI1UzYydTNyaDRXNXRTZUM1VUc6Vk1QQlZvQWZPQjVvamtHWFJERXR6dkRoUkxFTkhwYU4=" \
  -d "grant_type=authorization_code" \
  -d "code=HgnkwFsCpXYKUDvTfvjJV9ow8iEx3KaQ" \
  -d "redirect_uri=http://localhost:8181/oauth2/callback"
返回示例:
 {
   "access_token":"eyJhbGciOiJIUFSeqrqrqrqkpXVCJ9.eyJpc3MiOiJodHRwczovL2Nvbm5lY3QubGludXguZG8vIiwic3ViIjoiMTE4OSIsImF1ZCI6WyJodHRwczovL2Nvbm5lY3QubGludXguZG8vYXBpIl0sImV4cCI6MTcxOTI4ODMwOSwibmJmIjoxNzE5Mjg0NzA5LCJpYXQiOjE3MTkyODQ3MDksImF6cCI6ImhpM2dlSllmVG90b2lSNVM2MnUzcmg0VzV0U2VDNVVHIn0.k_rS8id4cQzr7r2DfnuQDEsj3bWCx3m0TyrzBTROxVE",
   "expires_in":3600,
   "refresh_token":"1U2weqer9ootn4BJwLsqH5Hg7ZAhdtDbRGat",
   "token_type":"bearer"
}
更新令牌
访问令牌有效期只有3600s,难道每次都要重新获取code?不,你可以使用刷新令牌更新访问令牌
请求示例:
curl -X POST \
  https://connect.linux.do/oauth2/token
  -H "Authorization: Basic aGkzZ2VKWWZUb3RvaVI1UzYydTNyaDRXNXRTZUM1VUc6Vk1QQlZvQWZPQjVvamtHWFJERXR6dkRoUkxFTkhwYU4=" \
  -H "Content-Type: application/x-www-form-urlencoded" \
  -d "grant_type=refresh_token" \
  -d "refresh_token=1U2weqer9ootn4BJwLsqH5Hg7ZAhdtDbRGat" \
返回示例:
{
   "access_token":"eyJhbGciOiJIUzSFS23kpXVCJ9.eyJpc3MiOiJodHRwczovL2Nvbm5lY3QubGludXguZG8vIiwic3ViIjoiMTE4OSIsImF1ZCI6WyJodHRwczovL2Nvbm5lY3QubGludXguZG8vYXBpIl0sImV4cCI6MTcxOTI4OTEwNCwibmJmIjoxNdfarFTA0LCJpYXQiOjE3MTkyODU1MDQsImF6cCI6ImhpM2dlSllmVG90b2lSNVM2MnUzcmg0VzV0U2VDNVVHIn0.QMc6FZDR3GuJ0jXuwxleu5BuymK5b3YWgOLawPtyzCA",
   "expires_in":3600,
   "token_type":"bearer"
}
第三步,获取资源
resource endpoint: https://connect.linux.do/api/user
请求示例:
curl -H "Authorization: Bearer eyJhbGciOiJIUFSeqrqrqrqkpXVCJ9.eyJpc3MiOiJodHRwczovL2Nvbm5lY3QubGludXguZG8vIiwic3ViIjoiMTE4OSIsImF1ZCI6WyJodHRwczovL2Nvbm5lY3QubGludXguZG8vYXBpIl0sImV4cCI6MTcxOTI4ODMwOSwibmJmIjoxNzE5Mjg0NzA5LCJpYXQiOjE3MTkyODQ3MDksImF6cCI6ImhpM2dlSllmVG90b2lSNVM2MnUzcmg0VzV0U2VDNVVHIn0.k_rS8id4cQzr7r2DfnuQDEsj3bWCx3m0TyrzBTROxVE" \
https://connect.linux.do/api/user
返回示例:
{
   "id":1189,
   "username":"Reno",
   "name":"",
   "avatar_template":"https://cdn.linux.do/user_avatar/linux.do/reno/288/4043_2.png",
   "active":true,
   "trust_level":3,
   "silenced":false,
   "external_ids":null,
   "api_key":"9PfcPcFWFSR_oq6T1L-whdFS234z6W1Z29cvjxd_rwuzQU"
}
SDK
Python篇
pip install Flask requests
from flask import Flask, session, redirect, request, jsonify
import os
import requests

app = Flask(__name__)
app.secret_key = os.urandom(24)

# OAuth2 参数
CLIENT_ID = 'hi3geJYfTotoiR5S62u3rh4W5tSeC5UG'
CLIENT_SECRET = 'VMPBVoAfOB5ojkGXRDEtzvDhRLENHpaN'
REDIRECT_URI = 'http://localhost:8181/oauth2/callback'
AUTHORIZATION_ENDPOINT = 'https://connect.linux.do/oauth2/authorize'
TOKEN_ENDPOINT = 'https://connect.linux.do/oauth2/token'
USER_ENDPOINT = 'https://connect.linux.do/api/user'

@app.route('/oauth2/initiate')
def initiate_auth():
    session['oauth_state'] = os.urandom(16).hex()
    authorization_url = f"{AUTHORIZATION_ENDPOINT}?client_id={CLIENT_ID}&response_type=code&redirect_uri={REDIRECT_URI}&state={session['oauth_state']}"
    return redirect(authorization_url)

@app.route('/oauth2/callback')
def callback():
    code = request.args.get('code')
    state = request.args.get('state')

    if state != session.get('oauth_state'):
        return 'State value does not match', 401

    auth = requests.auth.HTTPBasicAuth(CLIENT_ID, CLIENT_SECRET)
    data = {
        'grant_type': 'authorization_code',
        'code': code,
        'redirect_uri': REDIRECT_URI
    }
    headers = {'Accept': 'application/json'}
    response = requests.post(TOKEN_ENDPOINT, auth=auth, data=data, headers=headers)

    if response.status_code == 200:
        access_token = response.json().get('access_token')
        user_response = requests.get(USER_ENDPOINT, headers={'Authorization': f'Bearer {access_token}'})
        if user_response.status_code == 200:
            return jsonify(user_response.json())
        else:
            return 'Failed to fetch user info', user_response.status_code
    else:
        return 'Failed to fetch access token', response.status_code

if __name__ == '__main__':
    app.run(debug=True, port=8181)
Java篇
Maven依赖配置
<?xml version="1.0" encoding="UTF-8"?>
<project xmlns="http://maven.apache.org/POM/4.0.0"
         xmlns:xsi="http://www.w3.org/2001/XMLSchema-instance"
         xsi:schemaLocation="http://maven.apache.org/POM/4.0.0 http://maven.apache.org/xsd/maven-4.0.0.xsd">
    <modelVersion>4.0.0</modelVersion>

    <groupId>org.example</groupId>
    <artifactId>demo-OAuth2</artifactId>
    <version>1.0-SNAPSHOT</version>

    <properties>
        <java.version>17</java.version>
        <maven.compiler.source>17</maven.compiler.source>
        <maven.compiler.target>17</maven.compiler.target>
        <project.build.sourceEncoding>UTF-8</project.build.sourceEncoding>
    </properties>

    <parent>
        <groupId>org.springframework.boot</groupId>
        <artifactId>spring-boot-starter-parent</artifactId>
        <version>2.7.3</version>
        <relativePath/>
    </parent>

    <dependencies>
        <dependency>
            <groupId>org.springframework.boot</groupId>
            <artifactId>spring-boot-starter-web</artifactId>
        </dependency>
    </dependencies>

</project>
application.yml 配置
server:
  port: 8181

linux-do:
  oauth2:
    client:
      registration:
        client-id: hi3geJYfTotoiR5S62u3rh4W5tSeC5UG
        client-secret: VMPBVoAfOB5ojkGXRDEtzvDhRLENHpaN
        redirect-uri: http://localhost:8181/oauth2/callback
        authorization-grant-type: authorization_code
        scope: read,write
      provider:
        authorization-uri: https://connect.linux.do/oauth2/authorize
        token-uri: https://connect.linux.do/oauth2/token
        user-info-uri: https://connect.linux.do/api/user
        user-name-attribute: id
OAuth2Controller.java
import org.springframework.beans.factory.annotation.Value;
import org.springframework.http.*;
import org.springframework.util.LinkedMultiValueMap;
import org.springframework.util.MultiValueMap;
import org.springframework.web.bind.annotation.GetMapping;
import org.springframework.web.bind.annotation.RequestMapping;
import org.springframework.web.bind.annotation.RequestParam;
import org.springframework.web.bind.annotation.RestController;
import org.springframework.web.client.RestTemplate;

import javax.servlet.http.HttpServletRequest;
import javax.servlet.http.HttpServletResponse;
import javax.servlet.http.HttpSession;
import java.io.IOException;
import java.math.BigInteger;
import java.nio.charset.StandardCharsets;
import java.security.SecureRandom;
import java.util.Base64;
import java.util.Map;

@RestController
@RequestMapping("/oauth2")
public class OAuth2Controller {

    @Value("${linux-do.oauth2.client.registration.client-id}")
    private String clientId;

    @Value("${linux-do.oauth2.client.registration.client-secret}")
    private String clientSecret;

    @Value("${linux-do.oauth2.client.registration.redirect-uri}")
    private String redirectUri;

    @Value("${linux-do.oauth2.client.provider.authorization-uri}")
    private String authorizationEndpoint;

    @Value("${linux-do.oauth2.client.provider.token-uri}")
    private String tokenEndpoint;

    @Value("${linux-do.oauth2.client.provider.user-info-uri}")
    private String userEndpoint;

    @GetMapping("/initiate")
    public void initiateAuth(HttpServletRequest request, HttpServletResponse response) throws IOException {
        HttpSession session = request.getSession();
        String state = new BigInteger(130, new SecureRandom()).toString(32);
        session.setAttribute("oauth2State", state);
        response.sendRedirect(String.format("%s?client_id=%s&response_type=code&redirect_uri=%s&scope=%s&state=%s",
                authorizationEndpoint, clientId, redirectUri, "read,write", state));
    }

    @GetMapping("/callback")
    public String handleAuthorizationCode(@RequestParam("code") String code, @RequestParam("state") String state, HttpServletRequest request) {
        String sessionState = (String) request.getSession().getAttribute("oauth2State");
        if (sessionState == null || !sessionState.equals(state)) {
            return "State mismatch error";
        }

        HttpHeaders headers = new HttpHeaders();
        headers.setContentType(MediaType.APPLICATION_FORM_URLENCODED);
        String auth = clientId + ":" + clientSecret;
        String encodedAuth = Base64.getEncoder().encodeToString(auth.getBytes(StandardCharsets.UTF_8));
        headers.add("Authorization", "Basic " + encodedAuth);

        MultiValueMap<String, String> requestBody = new LinkedMultiValueMap<>();
        requestBody.add("grant_type", "authorization_code");
        requestBody.add("code", code);
        requestBody.add("redirect_uri", redirectUri);

        HttpEntity<MultiValueMap<String, String>> requestEntity = new HttpEntity<>(requestBody, headers);

        RestTemplate restTemplate = new RestTemplate();
        ResponseEntity<Map> response = restTemplate.postForEntity(tokenEndpoint, requestEntity, Map.class);

        Map<String, Object> responseBody = response.getBody();

        if (responseBody != null && responseBody.containsKey("access_token")) {
            HttpHeaders userHeaders = new HttpHeaders();
            userHeaders.setBearerAuth(responseBody.get("access_token").toString());
            HttpEntity<String> entity = new HttpEntity<>(userHeaders);
            ResponseEntity<Map> userResponse = restTemplate.exchange(userEndpoint, HttpMethod.GET, entity, Map.class);

            Map<String, Object> userResBody = userResponse.getBody();
            if (userResBody != null) {
                return userResBody.toString();
            } else {
                return "Failed to obtain user details";
            }
        } else {
            return "Failed to obtain access token";
        }
    }
}
Node.js篇
npm install express axios express-session qs
const express = require('express');
const axios = require('axios');
const crypto = require('crypto');
const qs = require('qs');
const session = require('express-session');

const app = express();
const port = 8181;

// OAuth2 参数
const CLIENT_ID = 'hi3geJYfTotoiR5S62u3rh4W5tSeC5UG';
const CLIENT_SECRET = 'VMPBVoAfOB5ojkGXRDEtzvDhRLENHpaN';
const REDIRECT_URI = 'http://localhost:8181/oauth2/callback';
const AUTHORIZATION_ENDPOINT = 'https://connect.linux.do/oauth2/authorize';
const TOKEN_ENDPOINT = 'https://connect.linux.do/oauth2/token';
const USER_ENDPOINT = 'https://connect.linux.do/api/user';

app.use(express.json());
app.use(express.urlencoded({ extended: true }));
app.use(session({
    secret: crypto.randomBytes(24).toString('hex'),
    resave: false,
    saveUninitialized: true
}));

app.get('/oauth2/initiate', (req, res) => {
    req.session.oauthState = crypto.randomBytes(16).toString('hex');
    const authorizationUrl = `${AUTHORIZATION

_ENDPOINT}?client_id=${CLIENT_ID}&response_type=code&redirect_uri=${REDIRECT_URI}&state=${req.session.oauthState}`;
    res.redirect(authorizationUrl);
});

app.get('/oauth2/callback', async (req, res) => {
    const { code, state } = req.query;

    if (state !== req.session.oauthState) {
        console.error('State验证失败');
        return res.status(401).send('State value does not match');
    }

    try {
        const data = qs.stringify({
            grant_type: 'authorization_code',
            code: code,
            redirect_uri: REDIRECT_URI
        });

        const tokenResponse = await axios.post(TOKEN_ENDPOINT, data, {
            auth: {
                username: CLIENT_ID,
                password: CLIENT_SECRET
            },
            headers: { 'Content-Type': 'application/x-www-form-urlencoded' }
        });

        const userResponse = await axios.get(USER_ENDPOINT, {
            headers: { 'Authorization': `Bearer ${tokenResponse.data.access_token}` }
        });
        console.log('User response:', userResponse.data);
        res.json(userResponse.data);
    } catch (error) {
        console.error('Error during token fetch or user info retrieval:', error.message);

        if (error.response) {
            console.error('Error response data:', error.response.data);
            console.error('Error response status:', error.response.status);
            console.error('Error response headers:', error.response.headers);
        } else if (error.request) {
            console.error('No response received:', error.request);
        } else {
            console.error('Error', error.message);
        }

        return res.status(500).send('Failed to fetch access token');
    }
});

app.listen(port, () => {
    console.log(`App listening at http://localhost:${port}`);
});