在线体验
立即体验 Excalidraw
已知问题
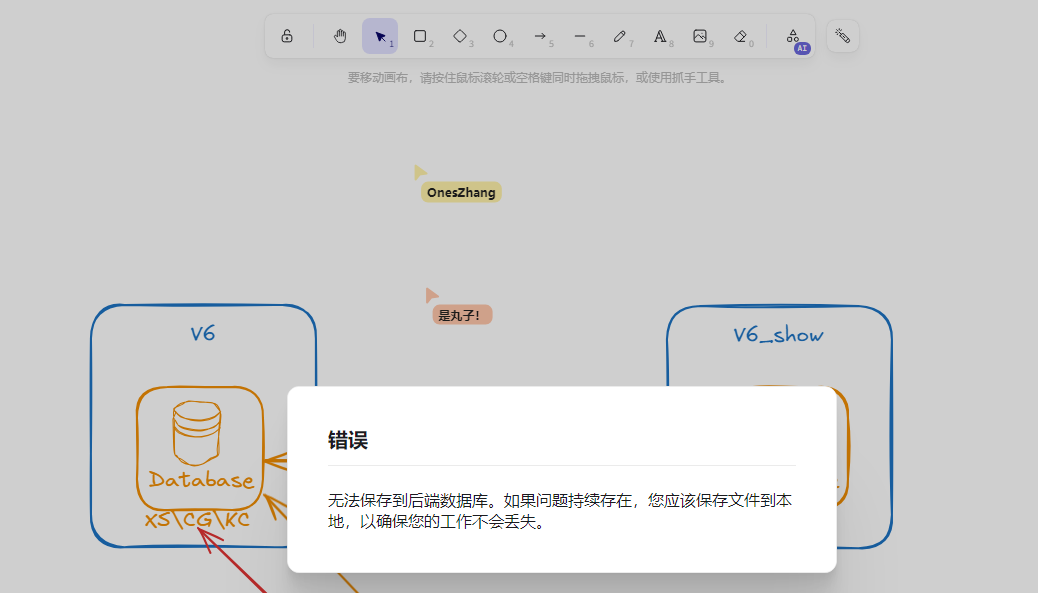
协同模式下后端数据异常提示,还请路过的大佬帮忙看看~
当前版本在协同状态下可能出现"无法保存到后端数据库…"警告,建议重要内容随时本地备份。
部署架构
部署准备
域名解析配置(本指南全程以oneszhang.com为例,改为你的域名即可~)
部署流程
1. 获取源代码
git clone示例:
git clone https://github.com/excalidraw/excalidraw
git clone https://github.com/excalidraw/excalidraw-room
git clone https://github.com/alswl/excalidraw-storage-backend
建议使用Releases版本(发行版)确保稳定性
2. Docker Compose配置
services:
  excalidraw:
    build:
      context: ./excalidraw
      args:
        - NODE_ENV=production
    container_name: excalidraw
    ports:
      - "12800:80"
    restart: on-failure
    environment:
      - NODE_ENV=production
      - VITE_APP_BACKEND_V2_GET_URL=https://json.oneszhang.com/api/v2/scenes/
      - VITE_APP_BACKEND_V2_POST_URL=https://json.oneszhang.com/api/v2/scenes/
      - VITE_APP_LIBRARY_URL=https://libraries.excalidraw.com
      - VITE_APP_LIBRARY_BACKEND=https://us-central1-excalidraw-room-persistence.cloudfunctions.net/libraries
      - VITE_APP_AI_BACKEND=https://oss-ai.excalidraw.com
      - VITE_APP_WS_SERVER_URL=https://draw-room.oneszhang.com
      - VITE_HTTP_STORAGE_BACKEND_URL=https://json.oneszhang.com/api/v2/

    volumes:
      - ./excalidraw:/opt/node_app/app:delegated
      - ./excalidraw/package.json:/opt/node_app/package.json
      - ./excalidraw/yarn.lock:/opt/node_app/yarn.lock
      - ./excalidraw/node_modules:/opt/node_app/app/node_modules

  excalidraw-room:
    build:
      context: ./excalidraw-room
    container_name: excalidraw-room
    ports:
      - "12801:80"
    restart: on-failure
    environment:
      - NODE_ENV=production


  excalidraw-storage-backend:
    build:
      context: ./excalidraw-storage-backend
    container_name: excalidraw-storage-backend
    ports:
      - "12802:8080"
    environment:
      STORAGE_URI: redis://redis:6379

  redis:
    image: redis
3. 启动服务
docker-compose up -d
4. 开始享用
浏览器访问:draw.oneszhang.com
指南中如果存在任何问题或优化点,或部署过程中如遇问题,欢迎各位佬在评论区交流讨论。
3 个赞
嗯,私有化是可以的,但是存到后端数据库有点问题,不知道有没有佬能帮忙看看,协作是完全没问题的,并且解决了不开梯子图片无法显示的问题
Borber
(𝘽𝙤𝙧𝙗𝙚𝙧)
4
我感觉直接 obsidian 插件就很方便了, 协同基本没用过
szehong26
(Yuen Sze Hong)
7
这个感觉ai就能写
# /etc/nginx/sites-available/example-proxy.conf

# --- HTTP to HTTPS Redirection ---
# Redirect all HTTP requests to HTTPS for the specified subdomains

server {
    listen 80;
    server_name draw.example.com draw-room.example.com json.example.com;

    # If using Certbot, this location might be needed for challenges
    location /.well-known/acme-challenge/ {
        root /var/www/html; # Or your webroot used by Certbot
    }

    location / {
        return 301 https://$host$request_uri;
    }
}

# --- HTTPS Server Blocks ---

# Main application: draw.example.com -> localhost:12800
server {
    listen 443 ssl http2; # Enable SSL and HTTP/2
    server_name draw.example.com;

    # SSL Certificate Configuration
    ssl_certificate /etc/letsencrypt/live/example.com/fullchain.pem; # Replace with your cert path
    ssl_certificate_key /etc/letsencrypt/live/example.com/privkey.pem; # Replace with your key path
    # Recommended SSL settings (Optional but good practice)
    include /etc/letsencrypt/options-ssl-nginx.conf; # If using Certbot defaults
    ssl_dhparam /etc/letsencrypt/ssl-dhparams.pem; # If using Certbot defaults

    access_log /var/log/nginx/draw.example.com.access.log;
    error_log /var/log/nginx/draw.example.com.error.log;

    location / {
        proxy_pass http://127.0.0.1:12800; # Forward requests to the backend service

        # Standard Proxy Headers
        proxy_set_header Host $host;
        proxy_set_header X-Real-IP $remote_addr;
        proxy_set_header X-Forwarded-For $proxy_add_x_forwarded_for;
        proxy_set_header X-Forwarded-Proto $scheme; # Important for HTTPS

        # WebSocket Support (Often needed for real-time features)
        proxy_http_version 1.1;
        proxy_set_header Upgrade $http_upgrade;
        proxy_set_header Connection "upgrade";

        # Optional: Increase timeouts if needed
        # proxy_connect_timeout 60s;
        # proxy_send_timeout 60s;
        # proxy_read_timeout 60s;
    }
}

# Collaboration service: draw-room.example.com -> localhost:12801
server {
    listen 443 ssl http2;
    server_name draw-room.example.com;

    # SSL Certificate Configuration (Use the same certificate as above if it covers this subdomain)
    ssl_certificate /etc/letsencrypt/live/example.com/fullchain.pem;
    ssl_certificate_key /etc/letsencrypt/live/example.com/privkey.pem;
    include /etc/letsencrypt/options-ssl-nginx.conf;
    ssl_dhparam /etc/letsencrypt/ssl-dhparams.pem;

    access_log /var/log/nginx/draw-room.example.com.access.log;
    error_log /var/log/nginx/draw-room.example.com.error.log;

    location / {
        proxy_pass http://127.0.0.1:12801;

        # Standard Proxy Headers
        proxy_set_header Host $host;
        proxy_set_header X-Real-IP $remote_addr;
        proxy_set_header X-Forwarded-For $proxy_add_x_forwarded_for;
        proxy_set_header X-Forwarded-Proto $scheme;

        # WebSocket Support (Likely crucial for a collaboration service)
        proxy_http_version 1.1;
        proxy_set_header Upgrade $http_upgrade;
        proxy_set_header Connection "upgrade";
    }
}

# Storage service API: json.example.com -> localhost:12802
server {
    listen 443 ssl http2;
    server_name json.example.com;

    # SSL Certificate Configuration (Use the same certificate again)
    ssl_certificate /etc/letsencrypt/live/example.com/fullchain.pem;
    ssl_certificate_key /etc/letsencrypt/live/example.com/privkey.pem;
    include /etc/letsencrypt/options-ssl-nginx.conf;
    ssl_dhparam /etc/letsencrypt/ssl-dhparams.pem;

    access_log /var/log/nginx/json.example.com.access.log;
    error_log /var/log/nginx/json.example.com.error.log;

    location / {
        proxy_pass http://127.0.0.1:12802;

        # Standard Proxy Headers
        proxy_set_header Host $host;
        proxy_set_header X-Real-IP $remote_addr;
        proxy_set_header X-Forwarded-For $proxy_add_x_forwarded_for;
        proxy_set_header X-Forwarded-Proto $scheme;

        # WebSocket Support (Include just in case, might not be needed for a JSON API)
        # proxy_http_version 1.1;
        # proxy_set_header Upgrade $http_upgrade;
        # proxy_set_header Connection "upgrade";
    }
}
好的,作为运维工程师,配置 Nginx 反向代理并启用 HTTPS 是日常操作。下面是针对你描述需求的 Nginx 配置,我已经将域名替换为 `example.com` 并添加了 HTTPS 支持。

**前提条件:**

1.  **Nginx 已安装:** 确保你的服务器上已经安装了 Nginx。
2.  **DNS 配置:** 确保以下域名已正确解析到你的 Nginx 服务器的公网 IP 地址:
    *   `draw.example.com`
    *   `draw-room.example.com`
    *   `json.example.com`
3.  **SSL 证书:** 你需要为 `example.com` 及其子域名获取有效的 SSL 证书。推荐使用 Let's Encrypt (可以通过 `certbot` 工具自动获取和续期)。假设你已经获取了证书,并且它们位于以下路径 (请根据实际情况修改):
    *   证书文件: `/etc/letsencrypt/live/example.com/fullchain.pem`
    *   私钥文件: `/etc/letsencrypt/live/example.com/privkey.pem`
    *   *注意*: 如果你为每个子域名单独获取了证书,你需要分别指定它们的路径。但通常一个包含所有子域名的通配符证书或 SAN 证书更方便管理。下面的配置假设你有一个包含这三个子域名的证书。
4.  **后端服务运行中:** 确保本地的 12800, 12801, 12802 端口上的服务正在运行。

**Nginx 配置文件:**

你可以将以下内容保存为一个文件(例如:`/etc/nginx/sites-available/example-proxy.conf`),然后创建一个符号链接到 `sites-enabled` 目录 (`ln -s /etc/nginx/sites-available/example-proxy.conf /etc/nginx/sites-enabled/`)。

```nginx
# /etc/nginx/sites-available/example-proxy.conf

# --- HTTP to HTTPS Redirection ---
# Redirect all HTTP requests to HTTPS for the specified subdomains

server {
    listen 80;
    server_name draw.example.com draw-room.example.com json.example.com;

    # If using Certbot, this location might be needed for challenges
    location /.well-known/acme-challenge/ {
        root /var/www/html; # Or your webroot used by Certbot
    }

    location / {
        return 301 https://$host$request_uri;
    }
}

# --- HTTPS Server Blocks ---

# Main application: draw.example.com -> localhost:12800
server {
    listen 443 ssl http2; # Enable SSL and HTTP/2
    server_name draw.example.com;

    # SSL Certificate Configuration
    ssl_certificate /etc/letsencrypt/live/example.com/fullchain.pem; # Replace with your cert path
    ssl_certificate_key /etc/letsencrypt/live/example.com/privkey.pem; # Replace with your key path
    # Recommended SSL settings (Optional but good practice)
    include /etc/letsencrypt/options-ssl-nginx.conf; # If using Certbot defaults
    ssl_dhparam /etc/letsencrypt/ssl-dhparams.pem; # If using Certbot defaults

    access_log /var/log/nginx/draw.example.com.access.log;
    error_log /var/log/nginx/draw.example.com.error.log;

    location / {
        proxy_pass http://127.0.0.1:12800; # Forward requests to the backend service

        # Standard Proxy Headers
        proxy_set_header Host $host;
        proxy_set_header X-Real-IP $remote_addr;
        proxy_set_header X-Forwarded-For $proxy_add_x_forwarded_for;
        proxy_set_header X-Forwarded-Proto $scheme; # Important for HTTPS

        # WebSocket Support (Often needed for real-time features)
        proxy_http_version 1.1;
        proxy_set_header Upgrade $http_upgrade;
        proxy_set_header Connection "upgrade";

        # Optional: Increase timeouts if needed
        # proxy_connect_timeout 60s;
        # proxy_send_timeout 60s;
        # proxy_read_timeout 60s;
    }
}

# Collaboration service: draw-room.example.com -> localhost:12801
server {
    listen 443 ssl http2;
    server_name draw-room.example.com;

    # SSL Certificate Configuration (Use the same certificate as above if it covers this subdomain)
    ssl_certificate /etc/letsencrypt/live/example.com/fullchain.pem;
    ssl_certificate_key /etc/letsencrypt/live/example.com/privkey.pem;
    include /etc/letsencrypt/options-ssl-nginx.conf;
    ssl_dhparam /etc/letsencrypt/ssl-dhparams.pem;

    access_log /var/log/nginx/draw-room.example.com.access.log;
    error_log /var/log/nginx/draw-room.example.com.error.log;

    location / {
        proxy_pass http://127.0.0.1:12801;

        # Standard Proxy Headers
        proxy_set_header Host $host;
        proxy_set_header X-Real-IP $remote_addr;
        proxy_set_header X-Forwarded-For $proxy_add_x_forwarded_for;
        proxy_set_header X-Forwarded-Proto $scheme;

        # WebSocket Support (Likely crucial for a collaboration service)
        proxy_http_version 1.1;
        proxy_set_header Upgrade $http_upgrade;
        proxy_set_header Connection "upgrade";
    }
}

# Storage service API: json.example.com -> localhost:12802
server {
    listen 443 ssl http2;
    server_name json.example.com;

    # SSL Certificate Configuration (Use the same certificate again)
    ssl_certificate /etc/letsencrypt/live/example.com/fullchain.pem;
    ssl_certificate_key /etc/letsencrypt/live/example.com/privkey.pem;
    include /etc/letsencrypt/options-ssl-nginx.conf;
    ssl_dhparam /etc/letsencrypt/ssl-dhparams.pem;

    access_log /var/log/nginx/json.example.com.access.log;
    error_log /var/log/nginx/json.example.com.error.log;

    location / {
        proxy_pass http://127.0.0.1:12802;

        # Standard Proxy Headers
        proxy_set_header Host $host;
        proxy_set_header X-Real-IP $remote_addr;
        proxy_set_header X-Forwarded-For $proxy_add_x_forwarded_for;
        proxy_set_header X-Forwarded-Proto $scheme;

        # WebSocket Support (Include just in case, might not be needed for a JSON API)
        # proxy_http_version 1.1;
        # proxy_set_header Upgrade $http_upgrade;
        # proxy_set_header Connection "upgrade";
    }
}
说明:
- HTTP to HTTPS Redirection: 第一个
server 块监听 80 端口,并将所有对这三个子域名的 HTTP 请求永久重定向 (301) 到对应的 HTTPS 版本。
- HTTPS Server Blocks: 为每个子域名 (
draw, draw-room, json) 创建了一个单独的 server 块,它们都监听 443 端口并启用了 ssl 和 http2。
- SSL Configuration: 每个 HTTPS
server 块都指定了 SSL 证书和私钥的路径。include 和 ssl_dhparam 指令通常由 Certbot 自动配置,用于加强 SSL/TLS 安全性。请务必将 /etc/letsencrypt/live/example.com/... 替换为你实际的证书文件路径。
proxy_pass: 这是反向代理的核心指令,将请求转发到后端的 http://127.0.0.1:<端口>。proxy_set_header: 这些指令用于向后端服务传递重要的请求头信息:
Host: 原始请求的主机名。X-Real-IP: 客户端的真实 IP 地址。X-Forwarded-For: 代理链,包含客户端 IP。X-Forwarded-Proto: 原始请求的协议 (http 或 https),后端服务可以用它来判断请求是否最初是通过 HTTPS 发起的。
- WebSocket Support:
proxy_http_version 1.1;, proxy_set_header Upgrade $http_upgrade;, proxy_set_header Connection "upgrade"; 这三行是为了支持 WebSocket 连接,这对于实时协作服务 (draw-room) 来说通常是必需的。对于 draw 和 json 是否需要,取决于具体应用实现,但加上通常无害。
- Logging: 为每个服务配置了独立的访问日志和错误日志,方便排查问题。
部署步骤:
- 将上述配置保存到 Nginx 配置目录(如
/etc/nginx/sites-available/example-proxy.conf)。
- 创建符号链接:
sudo ln -s /etc/nginx/sites-available/example-proxy.conf /etc/nginx/sites-enabled/ (如果 sites-enabled 目录存在并被 Nginx 主配置 include 的话)。或者,如果你的 Nginx 配置 include /etc/nginx/conf.d/*.conf;,你可以直接将文件保存到 /etc/nginx/conf.d/example-proxy.conf。
- 测试配置语法:
sudo nginx -t
- 如果测试成功,重新加载 Nginx:
sudo systemctl reload nginx 或 sudo service nginx reload。
现在,访问 https://draw.example.com, https://draw-room.example.com, https://json.example.com 应该会被 Nginx 代理到你本地对应的端口,并且强制使用 HTTPS。 HTTP 请求会被自动重定向到 HTTPS。
gemini 2.5 pro
1 个赞
这个excalidraw-storage-backend我是用来解决图片在协同无法展示的问题,如果不考虑粘贴图片,可以不使用这个服务(毕竟后端数据存储的报错暂时没解决 )
)
交作业,已成功部署,就是协同30s才能看到。服务器原因吗